
How to Install and Operate the DA Mini HVAC Dispenser
DA Mini HVAC Dispenser Instruction Manual (bilingual) ![]()
General Installation Steps
 |
How to Place the Batteries:
|
|
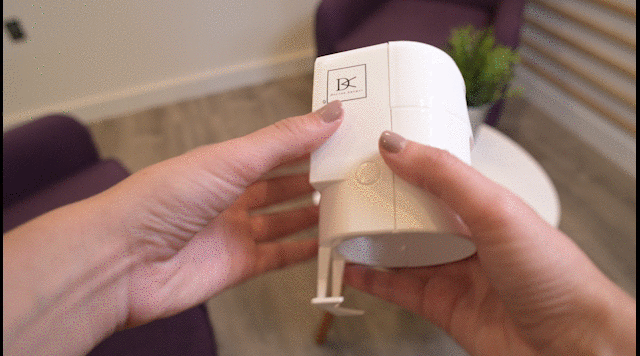
How to Insert the Refill:
Open the cover and use the remote control to push up the mechanical trigger if it is in a down position (trigger should be out of sight). Hook the dispenser to the Aroma Refill 3000, fitting the edge of the can to the corresponding ring. Make sure you slide it to the very end. Close the cover of the dispenser. Make sure it is tightly closed and check to make sure it’s in the right position. |
 |
Where to Install
For closed HVAC units (filter inside the unit or inside wall or ceiling) - *Most common in Canada*:
Option A – Dispenser inside the return duct:
If you have an access door to the return duct, simply place the dispenser attached to the refill inside the duct, standing in the upright position, aiming towards the direction of the filter.
Note: the access door will need to be open for the remote control to work (i.e. the remote control needs to have direct aim towards the green signal receipt screen).
See examples below (some examples are of the DA PRO HVAC Dispenser but location is the same for the DA Mini HVAC Dispenser):
 |
 |
Option B – Dispenser installed outside the return duct:
| Make two holes in the return duct in the place where you wish to install the dispenser. Follow the drawing. The upper smaller hole is for the hanging screw. The lower bigger hole is for inserting the extension spray nozzle tip of the refill, so it can spray the aroma and fragrances into the return duct. | |
| Install the T-Angle hanger adaptor on the top front of the dispenser using the screws already on the top of the dispenser. See images. The T-Angle hanger is an adaptation that will allow you to hang the dispenser backwards (i.e. hang from the front) so that you can spray directly into the duct through the hole you made earlier. | |
| Remove the spray nozzle of the Doctor Aromas Aroma Refill 3000 and replace it with the supplied extension spray nozzle. BE CAREFUL NOT TO ACCIDENTALLY SPRAY YOURSELF IN THE FACE. Install into the dispenser (see general installation steps above). Note: keep this extension spray nozzle as you will use it with subsequent future refills. | |
| Hang the dispenser from the upper hole. When doing so, make sure the extension spray nozzle tip passes through the lower hole in the return duct so that it sprays into the duct. | |
| Note: In this setup, For the remote control to work properly, you have to make sure to accurately aim the remote control towards the green signal receipt screen, which will now be aimed towards the duct instead of out. |
See examples below (some examples are of the DA PRO HVAC Dispenser but location is the same for the DA Mini HVAC Dispenser):
 |
 |
 |
For HVAC units with exposed air filter (i.e. no return duct):
| Position A – Filter is parallel to the floor (horizontal): Mount the dispenser hanging from the wall below the filter. Please make sure the HVAC unit is in the ON position (and not AUTO) for the system to work properly and efficiently (the HVAC needs to suction the spray). |
Position B – Filter is parallel to the wall (vertical): If you have a distance of 4 to 10 inches (10 to 25 cm) from the wall to the filter, mount the dispenser from the wall aiming towards the filter. If you have a distance of less than 4 inches (10 cm), hang the dispenser on the wall perpendicular to the filter. |
 |
 |
Operation of the DA Mini Dispenser
 |
You may use the TEST button on the control (it will spray if correctly installed) and then initiate the setting you desire by using the remote control. NOTE: You will hear a beep whenever the dispenser received the command from the remote control. If you do not hear a beep, that means the dispenser did not receive the command. Make sure to aim the control properly to the green signal receipt screen. Tip: You can press TEST whenever you want an extra spray (i.e. guests arrived and you cooked something with a strong scent). |
|
Use the ON and OFF buttons to begin using the system or to turn it off. When the system is on, you can program the dispenser to the desired intensity by choosing the spray intervals (every 5 mins, 10 mins, 20 mins, 25 mins, 30 mins, 1 hour or every 3 hours) and then the amount of consecutive sprays (1, 2 or 3). NOTE: We recommend to always use the “1” unless you have special needs that justifies spraying two or three times consecutively. For spaces of 3000 sqft, we recommend starting with 1 spray every 20 mins and then adjust based on preference (increase interval if you wish to diminish intensity, decrease interval if you wish to increase intensity). After the programming, the dispenser’s green LED flashes every 5 mins. Start with a longer interval for smaller spaces. |
 |
 |
To stop it whenever you want (i.e. You are not home, you don't want to sleep with perfume, etc.) just press OFF. To activate it again, press ON and indicate the interval and number of sprays again. |
| Tip: To keep your house consistently perfumed, keep the FAN on the thermostat in the ON mode (and not on AUTO), so you always have a continuous (and scented) airflow. |
 |